

Guava has always held a special place in my heart. It’s not just a fruit to me it’s a little green miracle packed with flavor, freshness, and memories. I’ve loved guava ever since I was a kid, but as I grew older, I started getting more curious. Every time I sat down with a plate of guava slices, my phone or laptop was never too far away. I would start searching things like “What’s inside a guava?”, “Why is guava so healthy?”, or “Can I grow guava at home?”
That curiosity slowly turned into passion. I began learning not only about guava’s amazing nutrients and health benefits but also about how to grow it myself from seed to fruiting tree. The more I read, the more I wanted to try it with my own hands. I still remember my first attempt carefully collecting the seeds from a sweet, ripe guava and drying them with excitement and patience. It felt like the beginning of something truly special.

Over time, my small experiment became a habit. I started observing how guava plants grow, what kind of soil they love, how much water they need, and how to care for them through every stage. I even learned how different guavas taste the raw ones being crisp and tangy, while the ripe ones turn soft, sweet, and aromatic. Each phase taught me something new, not just about plants, but about patience, care, and growth in life itself.
Today, I want to share everything I’ve learned not from books or random websites, but from my real-life experience. Whether you love guava for its taste, its health benefits, or you’re dreaming of growing your own tree at home, this guide is for you. I’ll walk you through every step from understanding its nutrients to collecting seeds, planting, caring, and finally enjoying your own home-grown guavas. Let’s dive in and make this journey together!
Why Guava is Amazing for Your Health

I’ve always loved snacking on guavas, and I noticed some real benefits in my daily life. Here’s what guava packs:
Vitamins: C, A, K, E, B1, B2, B3, B5, B6, Folate
Minerals: Potassium, Magnesium, Calcium, Iron, Phosphorus, Zinc
Fiber: Loads of dietary fiber for healthy digestion
Antioxidants: Lycopene, Quercetin, Carotenoids
Here’s how I personally felt the effects:
-
Blood sugar control: Eating guava regularly helped me feel more balanced—I didn’t get those sugar spikes.
-
Heart health: I’ve noticed my blood pressure and cholesterol feel more stable when I include guava in my diet.
-
Better vision: Guava is rich in vitamin A, and I feel it helps my eyes stay sharp.
-
Digestive health: The fiber keeps my stomach happy I rarely feel bloated.
-
Weight management: Low calories and high fiber mean I can snack guilt-free.
-
Stronger immunity: Vitamin C gives me a noticeable boost, especially during cold season.
-
Healthy skin and hair: Vitamin E and C make my skin glow and keep hair fall minimal.
-
Anemia prevention: Iron helps me feel energetic, especially after long workdays.
-
Bone strength: Calcium and magnesium support strong bones.
-
Kidney and urinary health: Potassium helps flush excess salt.
Honestly, I’ve felt these benefits firsthand. It’s amazing how a simple fruit can do so much!
Picking the Perfect Guava for Seeds
When I first decided to grow my own guava plant, I thought any guava from the market would do. I picked one randomly, cleaned the seeds, and waited for them to sprout but nothing happened. That’s when I realized how important it is to choose the right fruit. The quality of your guava tree actually begins with the fruit you select. So I started taking the process seriously and began learning by observing, trying, and sometimes failing.
Now, after several tries, I can easily tell which guavas are perfect for collecting seeds. I always look for fully ripe, naturally sweet fruits the ones that feel firm yet slightly soft when pressed. The aroma is another sign; if it smells fresh and fruity, that’s a good one. I stay away from guavas with tiny dark spots or any that look artificially colored. Those usually come from chemical ripening or poor storage, and the seeds inside are often weak.
One thing I noticed from my own garden is that darker yellow or pink guavas especially those that ripen naturally on the tree give the best results. These guavas are richer in nutrients, and their seeds are full of life. I remember walking around my local market once, holding different guavas in my hands, gently pressing each one and even smelling them. The sellers probably thought I was a little too serious about guavas, but I didn’t care I wanted the best start for my plants!
After years of experimenting, I’ve learned that patience and attention make all the difference. When you take your time to pick the right guava, you’re not just choosing a fruit you’re choosing the future of your garden. Every time I hold a perfectly ripe guava now, I can almost see the little green plant it could become. And trust me, that feeling is truly special. So take your time, look closely, and let your heart pick the guava that feels right. You won’t regret it.
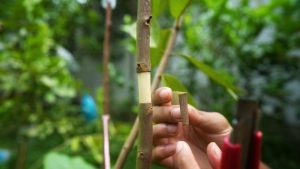
How to Collect Guava Seeds

Collecting guava seeds might sound like an easy task, but trust me, when you actually do it yourself, you realize it’s a little art of patience and care. I still remember my first time I had a perfectly ripe guava in my hand, and instead of just eating it, I decided to save its seeds. I carefully peeled off the skin and scooped out the soft, white inner flesh. It felt exciting because I knew these tiny seeds could one day grow into a real tree. I gently washed them under running water to remove every bit of sticky pulp. The cleaner the seeds, the healthier they sprout — that’s something I learned from experience.
After washing, I spread the seeds on a clean piece of paper and kept them in the shade to dry. It’s important not to keep them under direct sunlight, or they can lose their natural strength. I checked them every few hours like a curious kid waiting for a magic trick to happen. After about two days, the seeds turned dry and slightly rough to the touch that’s when I knew they were ready. There’s something satisfying about seeing those tiny golden-brown seeds dry up, knowing they hold the potential to create life.
When the seeds were fully dry, I stored them in a small paper packet, labeled with the date and guava type a habit I developed to keep track of my experiments. I treated the process like nurturing something precious, because to me, each seed represented a future plant I would one day take care of. Every time I collect guava seeds now, it feels like I’m starting a new story one that begins in my kitchen and ends in my garden.
Growing Guava from Seeds

This is the part of gardening that truly excites me watching life grow from something as tiny as a guava seed. When I first started, I didn’t expect it to be such a patient process. I remember sitting with my handful of cleaned, dry seeds and feeling both nervous and hopeful. I rinsed them again gently, then soaked them in warm water overnight. The next morning, I noticed the seeds had slightly swollen a sign that they were waking up, ready to start their journey. That small change gave me so much joy because I knew I had done the first step right.
After soaking, I prepared my seed trays carefully. I mixed my favorite soil recipe half garden soil, one-fourth sand, and one-fourth compost. I always mix it with my hands because I like to feel the texture; if it feels soft and crumbly, I know the drainage will be good. Roots hate sitting in wet soil, and I learned that through trial and error. I placed each seed gently into the soil, covered it lightly, and sprayed a fine mist of water. Then I kept the tray in a shaded area where the sunlight wasn’t too harsh. Every morning, I checked the soil’s moisture level, making sure it stayed damp but not soggy.
After about two weeks, I noticed tiny green shoots pushing through the soil. It felt magical like all the waiting had finally paid off. I continued to care for them like little babies, adding a bit of organic compost once they started growing stronger. Later, as the seedlings matured, I gave them a small dose of NPK fertilizer mixed with manure. I learned to never rush this stage; slow and steady care always gives the best results. Every new sprout felt like a personal victory, reminding me that patience, consistency, and love truly make nature bloom.
Caring for Young Guava Plants
Once the seeds started sprouting, I realized this was the most delicate and emotional stage of the whole process. Those tiny green shoots looked so fragile, almost like they could break with a single touch. I still remember how nervous I was checking them every few hours to make sure they were fine. I kept the soil lightly moist all the time, never letting it dry out completely. It took me a few tries to find the perfect balance; too much water made the soil soggy, while too little slowed down growth. Over time, I learned to simply touch the top of the soil if it felt cool and slightly damp, that meant the plants were happy.
At first, I made the mistake of keeping the young plants under direct sunlight, thinking they’d grow faster. But I quickly learned that new guava seedlings prefer filtered light or light shade until they grow strong. So, I moved them under a shaded area where they could get gentle morning light but were protected from the harsh afternoon sun. I also misted them regularly during dry or hot days tiny water sprays that felt like giving them a refreshing drink. It became a calming routine for me, something I’d do while enjoying my morning tea in the garden.
After about 2-3 weeks, the seedlings started looking stronger, their little stems turning firm and green. Sometimes, it took up to 4 weeks depending on the weather, but I learned not to rush nature. Seeing them grow day by day felt like watching a small miracle unfold. I used to stand there quietly, proud and amazed that something I planted from a simple fruit had turned into living plants. That moment when your first guava seedling grows tall enough to hold its own is something every gardener should experience at least once in their life.
Transplanting Seedlings

Once my guava seedlings reached about 20-25 cm in height, it was finally time to give them a bigger home. I remember feeling both excited and a little nervous it felt like moving a baby to its own room for the first time. The stems had grown stronger, and the leaves looked bright green and healthy, a sure sign they were ready. I prepared large pots, around 20-25 liters each, with a diameter of about 45-50 cm. Using the same soil mix (50% garden soil, 25% sand, and 25% compost), I made sure the soil was loose and well-drained. That texture is key guava roots love airy soil that doesn’t hold too much water.
Before planting, I always add a small touch of natural goodness about one or two teaspoons of organic manure or compost. I gently loosened the seedlings from the tray, being careful not to damage their tiny roots. That part always made me nervous; one wrong move and weeks of care could be ruined. I placed each seedling into its new pot, filled in the gaps with soil, and pressed lightly around the base. Then came the first watering just enough to moisten the soil without making it soggy. The sound of water soaking into fresh soil always feels therapeutic to me.
From that day on, checking on my transplanted seedlings became a daily ritual. Every morning, I’d walk up to them, inspect the leaves, and touch the soil to see if it needed water. Watching them adjust and grow in their new pots gave me a deep sense of satisfaction. Over time, this little habit turned into a hobby I truly love. Each guava plant felt like a small victory proof that with a little patience and care, you can grow something amazing right from your own hands.
Guava Tree Maintenance
Once my guava plants settled into their pots, I realized that maintaining them was less about hard work and more about consistency. Watering was the first big lesson. I used to think more water meant faster growth, but I learned quickly that guava roots don’t like sitting in soggy soil. Now, I water about 1-2 liters per pot every two to three days, depending on the weather. During hot days, I check the topsoil if it feels dry and light, I water gently until it feels moist again. On cooler days, I hold off a bit. It’s all about balance, and once you get a feel for it, your plant will thank you by staying lush and green.
Fertilizing became another important part of my routine. Every two to three months, I add a small layer of organic compost around the base to feed the soil naturally. Then, every three to four months, I mix in about 20-25 grams of NPK fertilizer. I do this carefully because too much fertilizer can burn the roots. I noticed that after each feeding, the plant responded beautifully new leaves appeared brighter, and the growth became more steady. It almost felt like watching a friend regain energy after a good meal. I even kept a small notebook to track the dates and see how each plant reacted over time.
Like any living thing, guava trees have their challenges too. Sometimes, I’d notice tiny red or yellow spots on the leaves or small holes caused by pests. Instead of panicking, I learned to stay calm I’d trim away the affected parts and spray a mild organic pesticide made from neem oil. Within a week or two, the tree would recover and look even healthier. Taking care of my guava trees taught me patience and observation every leaf, every drop of water, every bit of care mattered. Over time, they truly started to feel like little green friends growing happily under my care.
Flowering and Fruiting

Once my guava tree grew strong, the next exciting stage was flowering. I realized that keeping the tree healthy was key regular watering, enough sunlight, and the right fertilizer made a huge difference. I used a phosphorus-rich fertilizer before the flowering season, and sometimes a gentle biostimulant to encourage blooms. Watching tiny buds slowly form and then open into beautiful flowers was one of the most satisfying moments in my gardening journey. I remember standing in my garden early in the morning, looking closely at each bud, feeling proud that all the care and patience had started showing results.
But flowering is only half the story; protecting the fruit is just as important. I learned to guard the developing guavas against pests using simple nets and organic sprays like neem oil. I also reached out to other gardening experts to get advice on the best fertilizers and treatments for fruiting, combining their tips with my own experience. The results were amazing healthy flowers turned into small fruits, and every time I saw the first tiny green guavas hanging on the branches, I felt a deep sense of accomplishment. It was proof that patience, learning, and hands-on care really pay off.
Harvesting and Enjoying Guavas

After patiently caring for my guava tree, the most exciting moment finally arrives harvesting the fruits. Typically, guavas ripen about 3-4 months after flowering, depending on the variety and weather. I always keep a close eye on them, picking the fruits before they over-ripen, because I want to enjoy them at their best and prevent them from falling off the tree. I store the harvested guavas in a shaded spot, away from direct sunlight, to preserve their freshness and flavor. Every harvest feels like a little celebration for all the care and effort I’ve put into my garden over the months.
I love comparing the tastes of raw and ripe guavas. Raw guavas are slightly tangy, firm, and refreshingly crisp perfect for chewing and even helping to strengthen teeth. Ripe guavas, on the other hand, are sweet, fragrant, and juicy, almost like nature’s candy. I usually enjoy both, sometimes starting with a raw slice in the morning and finishing the day with a ripe guava as a treat. Personally, eating the fruits I grew myself feels incredibly rewarding; every bite reminds me of the time, patience, and love I invested in nurturing my garden. It’s a joy I can’t get enough of!
Oh, actually I didn’t tell you — I have some more amazing gardening memories:
-
How to Grow a Mango Tree from a Ripe Fruit and Get the Same Mango
-
It’s Horrible Guide: How I Grew a Dragon Fruit Tree from a Tiny Seed to a Fruiting Wonder
Besides, you can also take more advanced knowledge and information from authentic sources.
Final Thoughts
Growing guava has been one of the most rewarding experiences of my life. It’s not just about enjoying a sweet, juicy fruit it’s about the journey, the patience, and the connection with nature. From the moment I carefully picked the perfect guava for seeds to the day I harvested my first home-grown fruit, every step taught me something new. I learned that gardening is as much about observation and care as it is about following steps each plant, each seed, has its own pace and personality.
One of the most important lessons I learned is patience. There were days when I worried whether the seeds would sprout, whether the seedlings would survive, or if the flowers would turn into healthy fruit. I consulted blogs, talked to gardening experts, and still took my own time to do things carefully. Watching the tiny shoots grow into sturdy plants reminded me that slow and steady effort always pays off. Gardening teaches you to celebrate small wins, like a new leaf, a budding flower, or the first tiny guava forming on the branch.
Another big takeaway is that attention to detail matters. Choosing ripe, healthy fruit for seeds, preparing the right soil mix, watering consistently, and protecting plants from pests all make a huge difference. I noticed that even small actions like lightly misting seedlings in hot weather, or adding a pinch of compost while transplanting helped my guava plants thrive. This method isn’t just for guavas; it works for almost any fruit tree, vegetable plant, or flowering shrub. By learning the needs of each plant and giving it consistent care, you can grow almost anything successfully at home.
The joy of harvesting and eating your own fruits is unmatched. Raw guavas gave me a refreshing, tangy snack, while ripe ones felt like nature’s candy. Every bite reminded me of all the time, effort, and love I put into my garden. The same feeling applies to other fruits too mangoes, papayas, or even tomatoes when you grow something from seed and finally enjoy the harvest, it creates a special bond with nature and the food you eat. It’s a reward that store-bought produce can’t replicate.
Finally, I want to encourage anyone thinking of starting their own guava or fruit garden: just start. Take your time, enjoy each step, and don’t be afraid to learn from mistakes. Whether it’s guava, citrus, or any other tree, this method works from selecting the perfect seed, preparing soil, caring for seedlings, to harvesting your first fruit. Once you experience it, you’ll fall in love not just with the fruits, but with the entire journey of gardening itself. It’s a hobby, a learning experience, and a way to connect with nature that you’ll cherish forever.