

Hey everyone! Today, I want to share a really cool trick I use to make a brand-new guava tree right from a branch of my old one. It’s a special trick, and I’m going to show you exactly how I do it, step-by-step.
The first thing I do is pick a nice, healthy branch. Then, I grab my sharp knife.
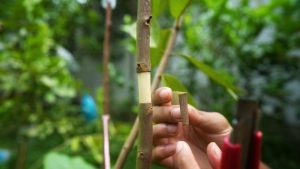
Now, watch closely. I take the knife and make a cut all the way around the branch, like I’m drawing a perfect circle on it. Then, I move down just a little bit, maybe about one inch, and I make a second circle-cut, just like the first one.
Once I have my two cuts, I carefully use my knife to peel off the ring of bark between them. It’s a bit like taking a little jacket off the branch.

When the bark is off, you’ll see the smooth, white part of the branch inside. This part is the secret!
This next step is the most important part of making the new tree. I take my knife and I gently, but very well, scrape this white part. I scrape it all around, making sure I clean it off completely.

Why do I do this? By cleaning this part, I’m sending a signal to the branch. I’m telling it, “This is the spot where you need to grow new roots!” If I do this step right, this is exactly where the new roots will start to grow.
How I prepared a part of the guava tree for grafting.
Alright, so that white part I just scraped is looking nice and clean. But I want to make it extra clean before the next step.

So, I grab my water bottle. I pour the fresh water all over the spot I just scraped. I wash it really, really well. I do this to make sure no sticky sap or any little bits of dirt are left. For this to work, the spot has to be perfectly clean.

Okay, now for my favorite part! This is the secret trick I use to help the new roots grow.
You know what I use? An onion!
That’s right, just a normal onion from the kitchen. I cut a fresh slice of it.
Then, I take that piece of onion and I rub it all over the clean white part of the branch. I make sure to get the onion juice all over that spot.
It might sound a little strange, but onion juice is a wonderful natural helper. It works to tell the branch, “Hey, this is the perfect place to start growing new roots!” This simple trick really helps the branch grow roots much faster and stronger.
What I did to make the cutting grow roots

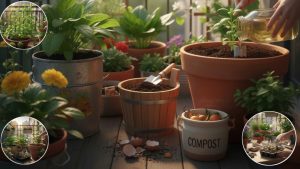
We are at the last big step! Now I have to make a little home for the new roots to grow in.
First, I get my special mix ready. This is just some good soil or a soft, fluffy material called coco peat (which is made from coconut husks). This is what the new roots will live in.
Then, I take a piece of black plastic. I wrap this plastic around the branch, right over that clean spot I made. I make sure to put my special soil mix inside the plastic, all around the branch.
Next, I need to close the bottom. I take a strong plastic zip tie and wrap it around the bottom of the plastic. I pull it really tight so none of the soil can fall out. It looks like a little bag on the branch.

Now, that soil inside is dry, and new roots need water to grow.
So, I take my water bottle and gently pour water into the open top of the plastic bag. I want to make sure all the soil inside gets nice and wet. This water is super important.
Once it’s all wet, I have to close the top. I take one more zip tie and wrap it around the top opening of the plastic. I pull it nice and tight.
you can also take more advanced knowledge and information from authentic sources.
Now the special soil is locked inside, safe and wet.
For the very last touch, I see the long ends of the zip ties sticking out. I take my scissors and snip! I cut those extra bits off.
And that’s it! The branch is all set. We just have to wait for the magic to happen and for the new roots to grow.
Checking the Roots

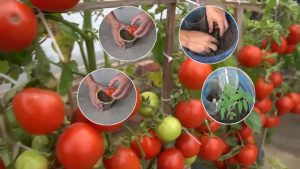
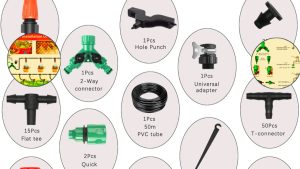
Also Need: Tomato Plant Care and Maintenance Automatic Drip and Mist Irrigation Kit
After waiting for a while, it’s time for the most exciting part!
First, I check my work. And guess what? It worked!
I can see a whole bunch of new, white roots. They grew right inside the plastic.
This is awesome. Seeing these healthy roots is great news.
It means the branch is ready to become a brand-new tree.
Cutting the New Plant

Now that the branch has its own roots, it’s time to move it.
It needs a new home.
I take my sharp cutters. They look like very strong scissors.
I carefully cut the branch right below the new ball of roots.
This separates the new baby plant from the big “mommy” tree.
Planting in the Pot

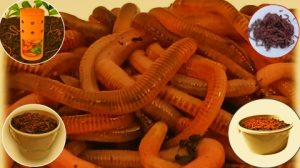
Also Read: Small-Scale Worm Composting
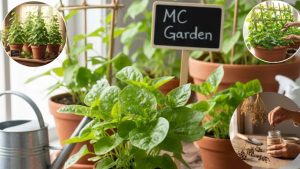
Next, I get the new home ready.
I have a nice green pot. You can see it says “MC Garden” on it.
I fill it with some really good, soft dirt. This dirt is great because it lets extra water drain out the bottom.
Now for the last step! I take my new little guava plant.Oh, you didn’t have to tell me.I have a complete journey with mangoes,Growing Dragon Fruit at Home,Guava Growing Guide

I plant it in the middle of the pot and gently pat the dirt down. This helps it stand up straight and tall.